Nederlandse Modelbouw en Luchtvaartsite
Dutch Modelling and Aviation
Recently Changed
Popular
- General Dynamics F-16: Jubilee schemes
- Consolidated PBY-5/5A Catalina
- North American B-25C/D and B-25J/K Mitchell: NEIAF
- Douglas DC-3/C-47 Dakota
- General Dynamics F-16A solo display teams
- Fairey Firefly
- Brewster B.339 Buffalo
- Lockheed F-104G Starfighter
- Hawker Hunter F.Mk.4; F.Mk.6 and T.Mk.7
- Curtiss P-40 Warhawk & Kittyhawk
History at Dutch Airforce
In 1975, the Bolkow Bo-105C helicopter was introduced at the Groep Lichte Vliegtuigen (Light Aircraft Group) as a replacement of the Piper Super Cub. Initially the Bo-105C's were divided between the 298 and 299 Squadron, both already operating the French Alouette III helicopter. In 1979 all Bo-105s were transferred to the 299 Squadron.
During the first years the Bolkows were only fit to be used under good visibility conditions. In order to operate even under poor visibility coditions and at night underwent Bo's a so-called Mid-Life Update (Bo105CB) in 1985. With this upgrade,the squadron was able to fly under instrument conditions and as the first to operate with in the Dutch Armed Forces, with Night Vision Goggles (NVG).
In 1990 the Bolkows were again modified and be better suited to be used for foreign operations and was marked Bo-105CB-4.
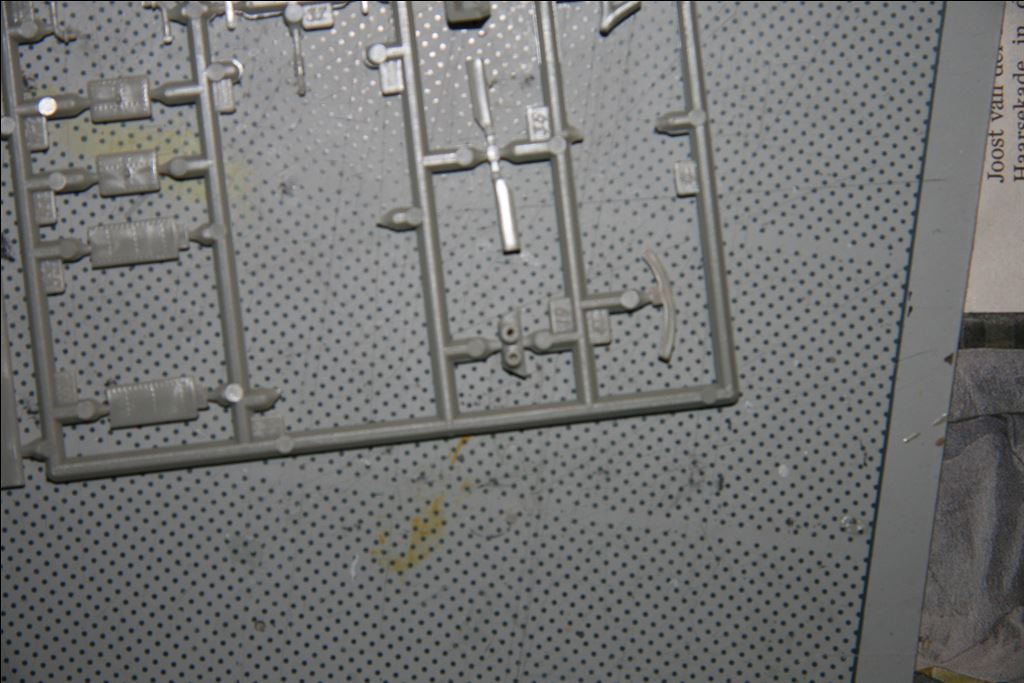
The model.

The Airfix Bo-105 kit, shown is teh boxing of the mid eighties release. The kit is now about forty years of age and 'suffers' the illustrious rivetting.
The model is refelcting the orignal ratherr well., but is representing or a protype or a civil example.
For a Dutch military example some modifications are necessary:
- First of all the seats, which showquite different from those used in the Dutch military Bo-105 and must therefore be modified.
- The rear seat must be removed and replaced with a collapsible steel frame with canvas cover, see this photo at modelbrouwers.nl (a Dutch Modellers forum)
- The console differs much from especially the later examples the instrument panel is wider and there is a kind of hood over it.
- Further a console is situated between the two front seats, and there are additional buttons on a panel from the ceiling. The seats of the kit are slightly too wide and are a bit too close together.
- The control sticks are actually pretty thick, you better replace them with thinner ones.
- On the outside certainly for the CB and CB-4 versions, you'll need to scratchbuild the baking under and at the rear of the fuselage were the tail boom is connected. NOTE: The first overall RAl 6014 sprayed Bo-105Cs lacked these. Shortly after applying the so-called 2KVP (two-color camouflage pattern) of RAL 6014 and black, early eighties, the Bolkows were modified. (I have some pictures of Bo-105Cs sprayed in 2KVP where the adjustment was not yet implemented.)
- The bulge beneath the cockpit houses an antenna for the Lightweight Doppler Navigation System (LDNS). This system can navigate in conjunction with inertial navigation and radiobeams, in fact sort of forerunner of the GPS.
- Behind the bump on the left (in the transition from cabin to the tail) is a Gyro (Rate Gyro) serving the flight stabilization system (SAS Stabilization Augmentation System).
Some photos of two Bo-105CBs taken in 1999 in the LeerDock (instruction) at airbase Gilze-Rijen.


- Further, the antenna on the right side on the top of the cabin and also lacks some other small stuff missing.
- The Bolkows which went on SFOR missions, received another modification, namely, a (slight), armouring of kevlar plates and also a sling was applied.
Building the kit.
The Fuselage
First cut away the back of part 1 and 10 and filled up the holes and leveled.
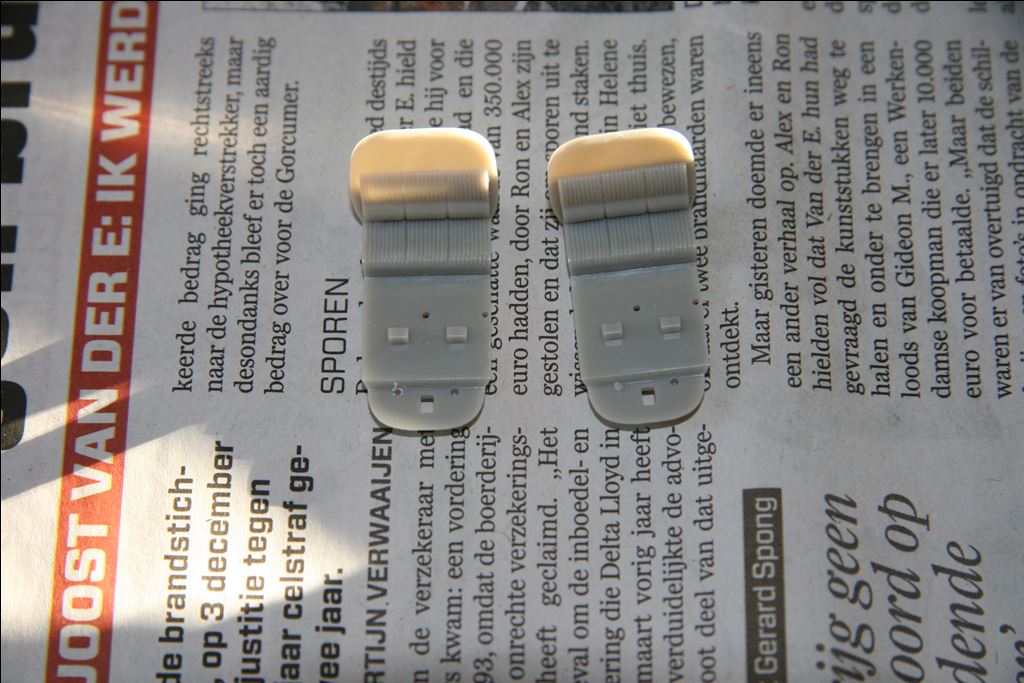
The back-seats as present in the kit resemble merely a bench.
I built a frame using plastic rod. This frame I painted light gray, RAL 7001 and made the canvas seat from Tamiya masking tape. It is best to assemble the seat before putting it in place. The colour of the seat varies, regarding the photos I have seen (might be dirt as well). You might use colours like Humbrol 71, 94, 29 or 121.
To fix the seat I drilled some holes in the bottom plate.
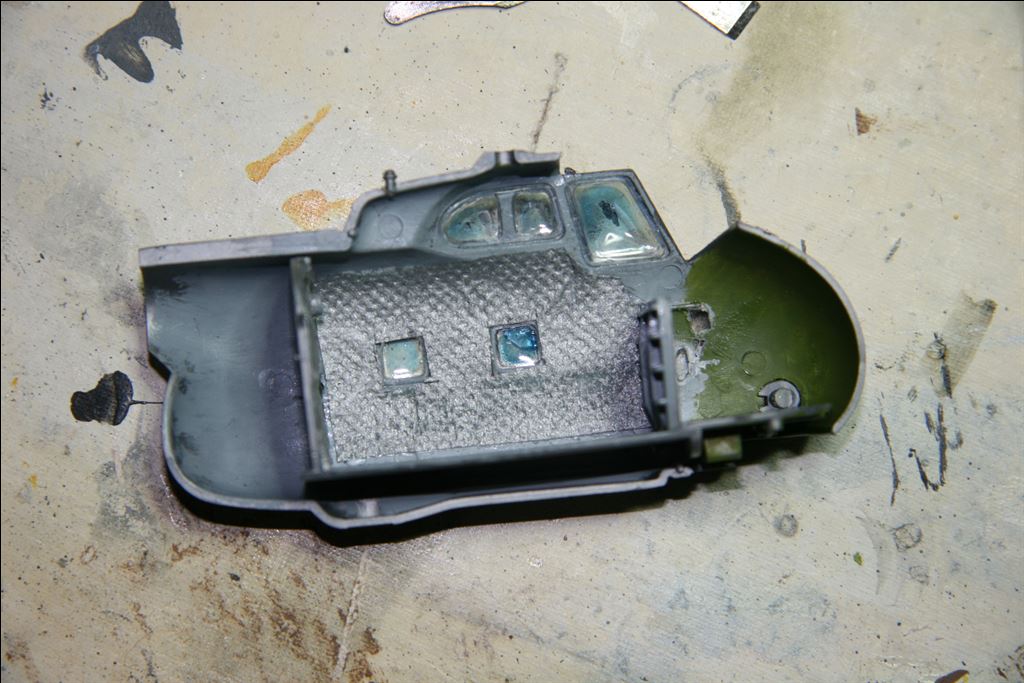
On part number 10 I glued (with e.g. Micro Scale Kristal Klear) a piece of light grey (Humbrol 67) painted toilet paper. This simulates the soundproofing quite well in 1/72nd scale. Don't add to much glue and don't press the paper to hard otherwise the structure of the paper is lost
Toilet paper added to a model of a Sikorsky H04S-3.
The same material is also added to the ceiling of the cabin.
The backrest I made also out of some Tamiya tape; folding it several times, so you get some kind of plate of approximately 1 mm thick, 2 mm in height and about 14 mm long.
Then parts 1 and 10 were mounted according to the manual and the backrest was added.
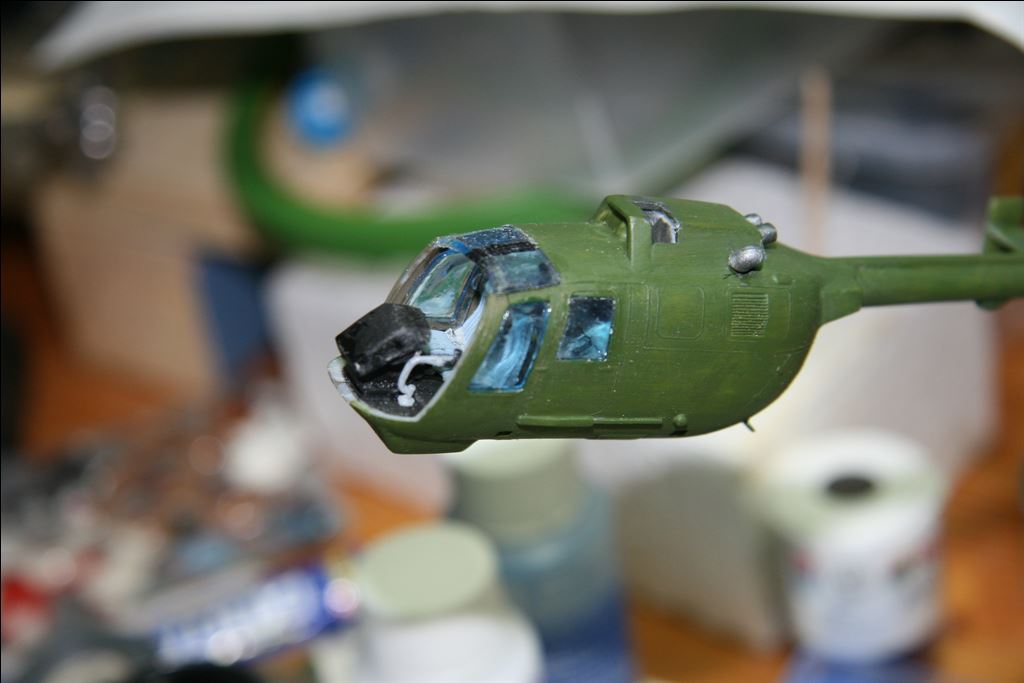
In the meantime I started to with the front instrument-panel. Fortunately you can find a very useful and complete walkaround at IPMS.nl.

Side view of the instrument panel.
A point of attention when adding the console is that part 29 (the front window of the cabin) must fit over it. I had initially overlooked this point and had to fix it afterwards.
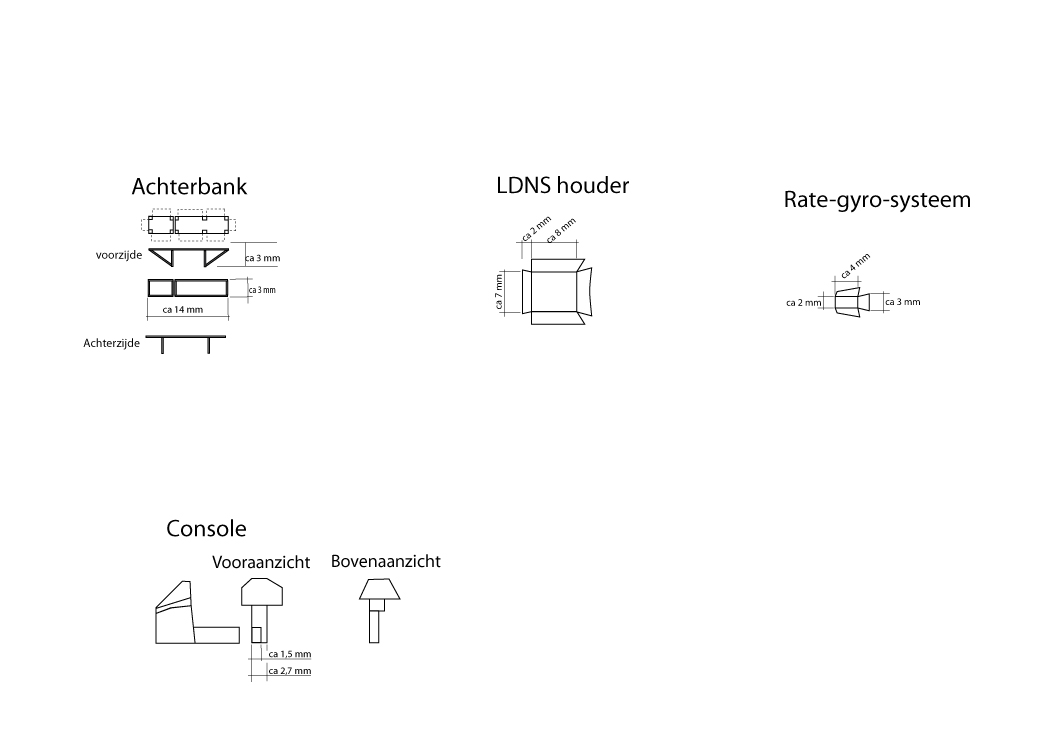
The parts you have to add to the kit (for a Dutch example).
When building the new console it showed tto stick between the two seats of the pilots. The exact width is unknown to me, but it will be about 15 cm, that is about 2 mm (1/72nd scale)
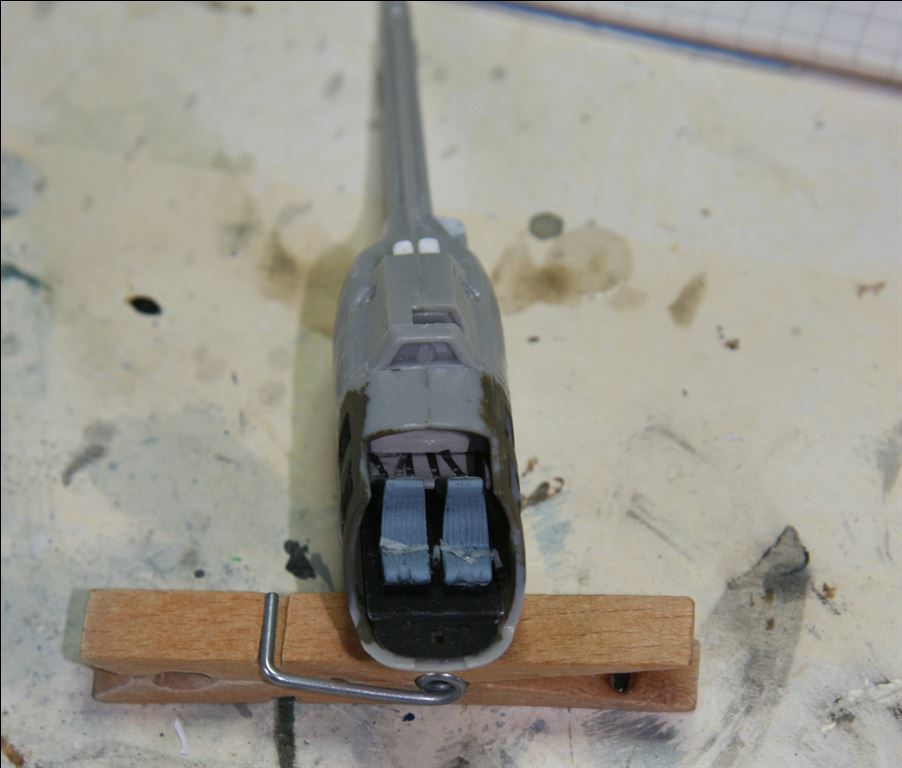
The space between seats proved to be too narrow, So the seats are so or too wide or too close to each other (or both, that is the question).
The width of the chairs is not known to me (I have not measured during the tour in 1999). It seems the width of the seats of the kit look pretty well compared with the real seats. This would mean that the seats have to be moved every about 0.6 mm to the outside. This in turn has consequences for parts 2 and 3, which therefore have to be moved too. Therefore parts 4 and 5 would have to be moved each about 0.6 mm outwards, so that they are again aligned in the middle of the chairs.
I have still chosen to adjust the chairs not that much and also to use the sticks (parts 2, 3, 4 and 5). The console between the seats I omitted.
The cabin is almost ready.
But the result was the instrument panel was a little too wide, so I've to fix it again to fit between both controls.
Part 41 is actually too thick, you can replace him with a piece of thin plastic. I have chosen to make it thinner with a small flat file.
The engine parts.
Unfortunately, the exhausts, parts 19, 30 and 31 all are solid. I tried to drill out part 19, the exhausts at the back, but that was not such a success.
The solid exhaust being replaced and drilled.
I cut them off and replaced them with two pieces of pipe, Evergreen 3/32 " tube, which is about 2.4 mm thick and corresponds well with the thickness of the exhaust.
The wall thickness was quite large, but I could fix that with careful removal.
Parts 30 and 31 are a bit harder to replace because of their curved shape, so I very carefully drilled them out.
The main rotor is quit good to build, you can choose to add more detail.
Part 42, the bumper differs completely from the bracket, as the Dutch Bolkows had applied. I had to create a new one.
The tail.
[foto IMG_0013 ]
Antennas
The it lacks in fact all antennas. The first version of the (Dutch) Bo-105, has no doppler and no gyro system. So this version misses the expansion under the cabin and on the left side, in the transition to the tail.
However you have to add for all version the relatively large blade antenna is on the top right of the hull.

The antennas.
On the latest version a small, red-colored blade antenna on the left is present.
Further you can add grips etcetera.
Painting
Throughout their career at the Dutch Air Force (though they were property of the ground forces), the Bolkow had several jackets.
At delivery they were entirely army green, RAL 6014 with black markings.
Initially the interior was white, at this photo at NIMH-Beelbank.defensie.nl this is good visible. Good observing of the photo shows no there was no sound-absorbing material was present. It is not known to me when this is done, possibly as soon as the inside was grey camouflaged in the 2KVP.
The seats of both pilots ar light blue-grey; I used Tamyia XF18, medium Blue mixed with white in a ratio of 1 on 1. Frame and conrol are RAL 7001.
The back wall was graphite grey (RAL 7012), the floor was camouflage green, RAL 6014. In the Bo-105CB4 the floor was also matte black. I've used the black for both models.
The initial whte interior was soon paintedd over with army green, RAL 6014.
One model I painted completely RAL 6014 (I brush still) covered with black, Humbrol 33. After applying the decals, I have some black paint diluted and applied it on the roundels. In the real wordl these were being sprayed with black, sometimes so strong that they were almost invisible.
The other model I painted according the latest camouflage pattern, 3KVP.
The green base for the three tone camouflage pattern is applied.
The decals originate from Dutch Decal Set 72040; a nice extensive set, unfortunately no longer available
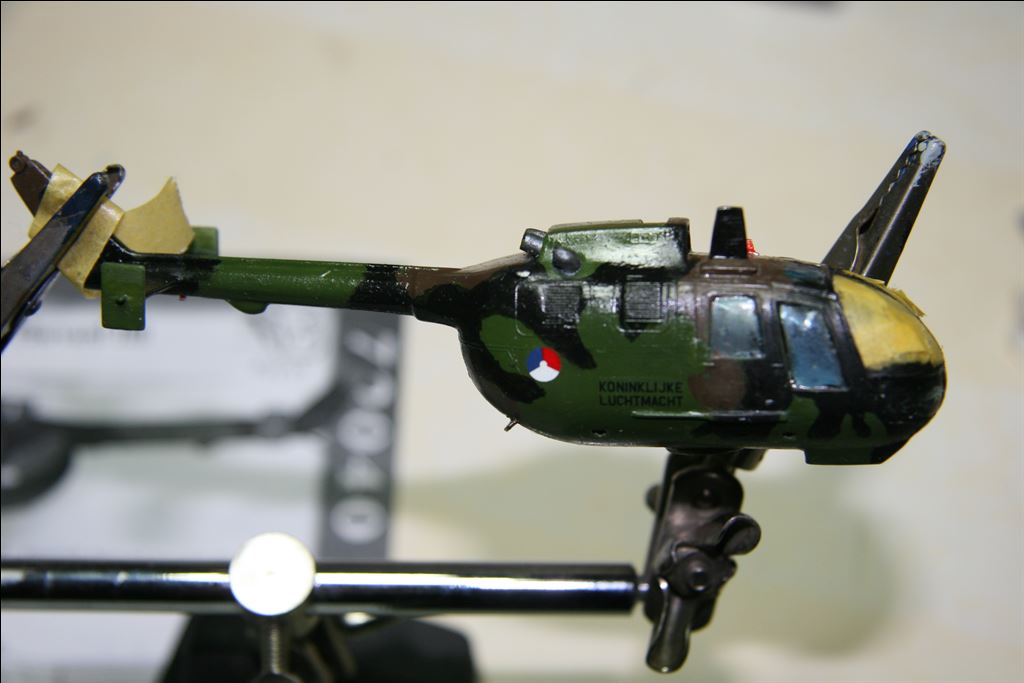
The three tone camouflage is rather difficult to apply on this little model.
Both models ar finished.


